Danube Dev Log pt 1

Introduction

I've never really done game development. Probably part of that is that I don't play a lot of them either. My "Games Of The Year" post from 2023 features [[https://cohost.org/stillinbeta/post/4039802-p-now-i-play-vide][six games], which was every game I played.

But I have had an idea kicking around in my head for a while. Every year or so I take a look at the Rust ecosystem and see if it's feasible to make my game yet. The last two attempts involved fyrox and amethyst] (now seemingly defunct). For this attempt I decided to go back to one I tried years ago and found immature: [[https://bevyengine.org/][bevy.

The Idea

The primary inspiration for this game (and the name) come from 2001: A Space Odyssey. But I've also seen similar sequences in The Outer Wilds, Elite: Dangerous, and even Sayonara Wild Hearts.

The basic idea is this: A structure is spinning in space, and your ship is approaching it. You need to match your velocity with the structure, especially angular velocity/roll.

This obviously needs to be a 3D game, but not a (technically) complicated one. At these scales I can effectively ignore gravity, and there's no body interaction physics. All we need to do is detect collisions and throw up a game over.

It's that last point that's proved a stumbling block in the past, but this time I made it work!

Bevy

Bevy is a native Rust game framework. It's possible to use engines like Godot with Rust, but I wanted the native experience. My project, my rules! Rust or bust!

Bevy is based on an "Entity Component System", which seems to like "Model View Controller" for video games. It seems to be a very trendy architecture, but I have no idea if it's good. This is my first game! Let's try it out.

Getting started

/Note that I will be assuming a little bit of Rust familiarity. Please get ahold of me with any questions!

Other languages I've used had enough boilerplate that you needed something like cargo-generate to start a project. Bevy is much more traditional. You add it to your Cargo.toml:

[dependencies]
bevy = "0.14" # make sure this is the latest version

And stick an invocation in main:

use bevy::prelude::*;

fn main() {
    App::new().add_plugins(DefaultPlugins).run();
}

the prelude concept is controversial, but it's sure good for iterating

cargo run and a empty window pops up. Not bad! What else can we do?

When the Entity has Components

A lot of things are written in Rust, but not everything feels like they're written for Rust. Bevy is definitely the latter. Let's spawn in a cube and make it rotate to show you what I mean.

Now, I could dig out Blender to draw a cube, but that's overkill. Bevy will let us build one easily:

let cube = Cuboid::from_length(1.0);

This builds us a mesh, which gives a shape. But that shape needs to exist in the world. For that, we'll use Pbr.

fn spawn_cube(mut commands: Commands) {
    let cube = Cuboid::from_length(1.0);

    let pbr = PbrBundle {
        mesh: cube,
        ..default()

    };
    commands.spawn(pbr);

}

And tell Bevy to run this:

fn main() {
    App::new()
        .add_systems(Startup, spawn_cube)
        .run();
}

But this doesn't quite work.

  $ cargo run
   Compiling danube-example v0.1.0 (/home/ellie/Projects/danube/danube-example)
error[E0308]: mismatched types
  --> src/main.rs:14:15
   |
14 |         mesh: cube,
   |               ^^^^ expected `Handle<Mesh>`, found `Cuboid`
   |
   = note: expected enum `bevy::prelude::Handle<bevy::prelude::Mesh>`
            found struct `bevy::prelude::Cuboid`

This is our first lesson of the ECS methodology: Individual components (for that's what the mesh attribute of ~PbrBundle is) tend to be as small as possible. So this one, instead of storing a copy of a mesh that might be spawned hundreds of times, wants a "handle" to one. To fix this, we'll need to add an Asset. And that'll show off one of Bevy's party tricks: what's a system actually?

Systemetise me Cap'n

Let's look at the call signature for add_systems.

  pub fn add_systems<M>(
    &mut self,
    schedule: impl ScheduleLabel,
    systems: impl IntoSystemConfigs<M>,
) -> &mut App

ScheduleLabel we can worry about later, but what's IntoSystemConfigs? it's complicated. The upside is that the arguments of a system function can take any or all of a large number of parameters. Right now we're just taking commands, but we want access to Mesh assets too. So those just go in the function signature:

fn spawn_cube(mut commands: Commands, mut meshes: ResMut<Assets<Mesh>>) 

ResMut means that this is a Resource, which is basically a global singleton. the Mut means its mutable, so we mark its variable as mutable.

Then we just add our cube to the meshes:

let mesh = meshes.add(cube);

let pbr = PbrBundle {
    mesh: mesh,
    ..default()

};

And it compiles! …but we can't see anything. Worry not, we just need to add a camera!

  fn add_camera(mut commands: Commands) {
    commands.spawn(Camera3dBundle {
        transform: Transform::from_xyz(5.0, 5.0, 5.0).looking_at(Vec3::ZERO, Dir3::Y),
        ..default()
    });
}

The transform line means "position this camera at 5,5,5 in the space, and consider Y to be up. The indespensible diagram of the coordinate system. (I am constantly making the hand gesture while programming).

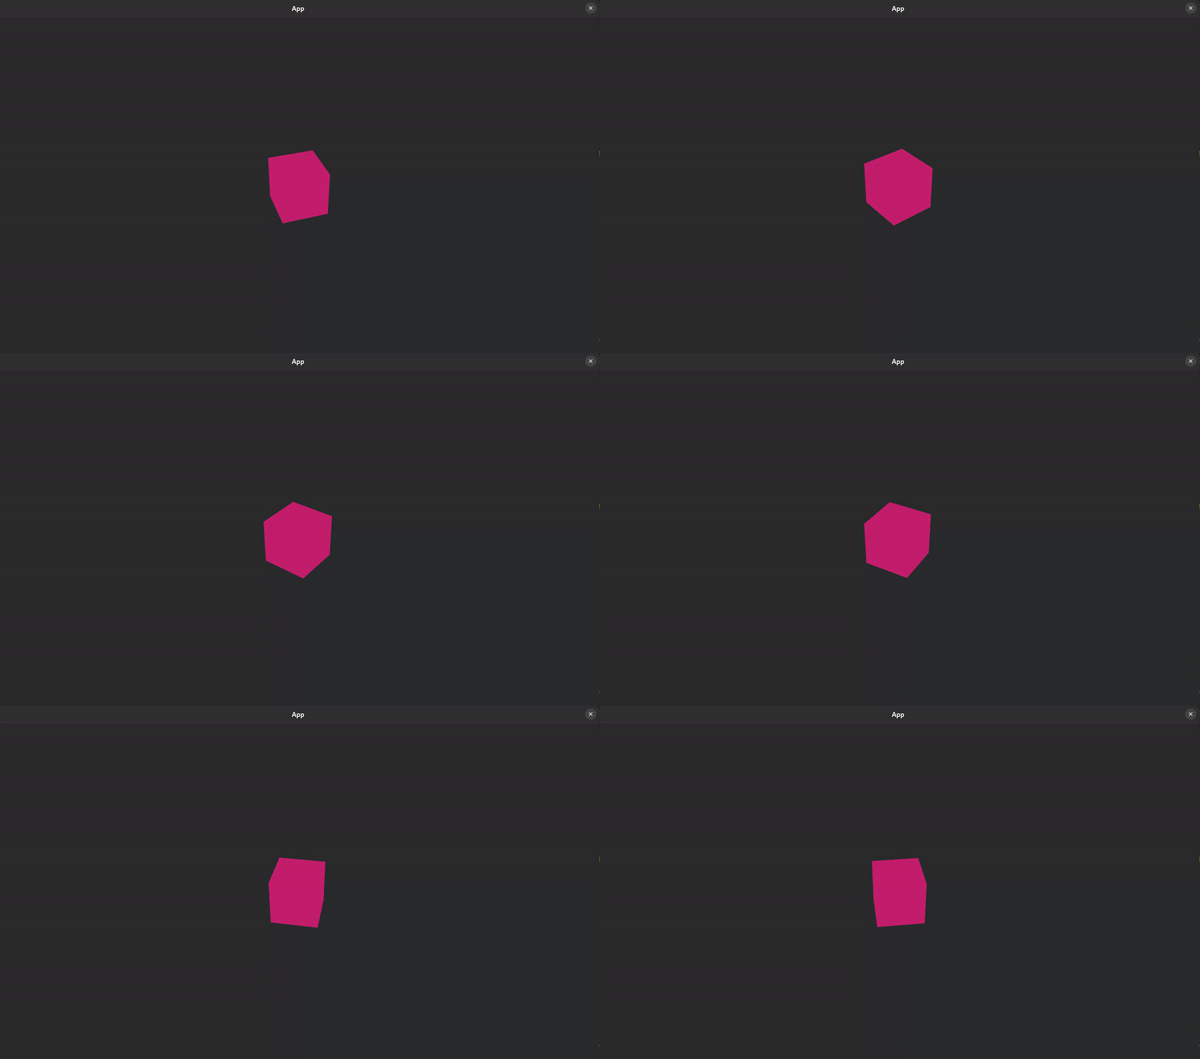
cargo run again and we get this!

A pink hexagon in the centre of the screen
Figure 1: a tasteful pink

Spin Spin Spin from the tableside

Let's make our cube spin!

First, we're going to make what we call a "marker struct."

#[derive(Component)
struct OurCube;

In most languages there'd be little point to defining an empty struct like this - it doesn't contain any information! But in Rust, despite having a size of zero bytes, empty structs are very useful.

First, we'll mark our Pbr struct with our struct:

commands.spawn((pbr, OurCube));

Bevy lets any tuple of components turn into an entity. Handy!

We want to make another system that spins our cube around. So we're going to write our first Query. Take a look:

fn spin_cube(mut query: Query<&mut Transform, With<OurCube>>, time: Res<Time>) {

Query is, in my opinion, one of the coolest uses of the Rust type system I've seen in a while. with the same expression you can declare what you're looking for and what shape it should take. We've requested every Transform that's associated with an OurCube. We also know that we want Transform to be mutable. And Bevy is smart enough to make sure nobody else will use this Transform while I've got a mutable reference to it. Pretty slick.

We grabbed time as well, because we need to know how much to spin the cube. We'll use Time::delta_seconds for this:

let rotation_rate = std::f32::consts::FRAC_PI_2;
let rotation = time.delta_seconds() * rotation_rate;

(Rotation is described in radians, so π/2 is a quarter rotation/second, or 15 RPM)

Then, we simply get our matches and apply the rotation!

for mut transform in query.iter_mut() {
    transform.rotate_axis(Dir3::Y, rotation);
}

Add our system to the app, making sure we specify Update instead of Startup:

.add_systems(Update, spin_cube)
A looped gif of a rotating pink cube
Figure 2: cube go spinny

Conclusion

Now, I fully admit to being a type system sicko; I wrote a lot of Haskell before I started doing Rust. But to me, the way Bevy uses ECS and the Rust type system together is just… beautiful.

Think about it: <Res<T> is basically a HashMap where the keys are types. The polymorphism of the systems is great: near complete freedom on parameters, strict guard rails for invalid queries. The using of marker types reminds me a bit of how Python sometimes uses object() as a sentinel type, if None is expected to be a valid input:

_default = object()
def f(val, param=_default):
    if param is _default:
        ...

But it's even nicer, because you can still attach methods to the marker type if you want!

Next Time

We made a cube rotate, but what about our docking bay door? Surely that won't be much harder? Or require an entire new piece of software??

New Kubernetes Meta

Forget about image building. CI? We don't need it. This is the next big thing kubernetes, and containers in general

Just Stick It In The YAML

containers:
  pony-client:
    image: python:3
    command:
      - sh
      - '-c'
      - |
          python <<EOF
          import random
          import requests
          import os
          import time

          if __name__ == "__main__":
            url = os.environ["PONY_API"] + '/ponies/'

            while True:
                if random.randint(1, 100) > 99:
                  requests.post(url + '2/vote')
                else:
                  requests.get(url)
              time.sleep(int(os.environ['SLEEP']))
          EOF

this doesn't work as-is because requests isn't in the standard python image but that's an implementation detail

Pros

  • No complicated build pipeline
  • Easy deployment
  • self-documenting (it's right there!)
  • basically serverless

Cons

  • Can't think of any

TrueNAS Scale Migration, or: Can't Escape K8s

What and Why

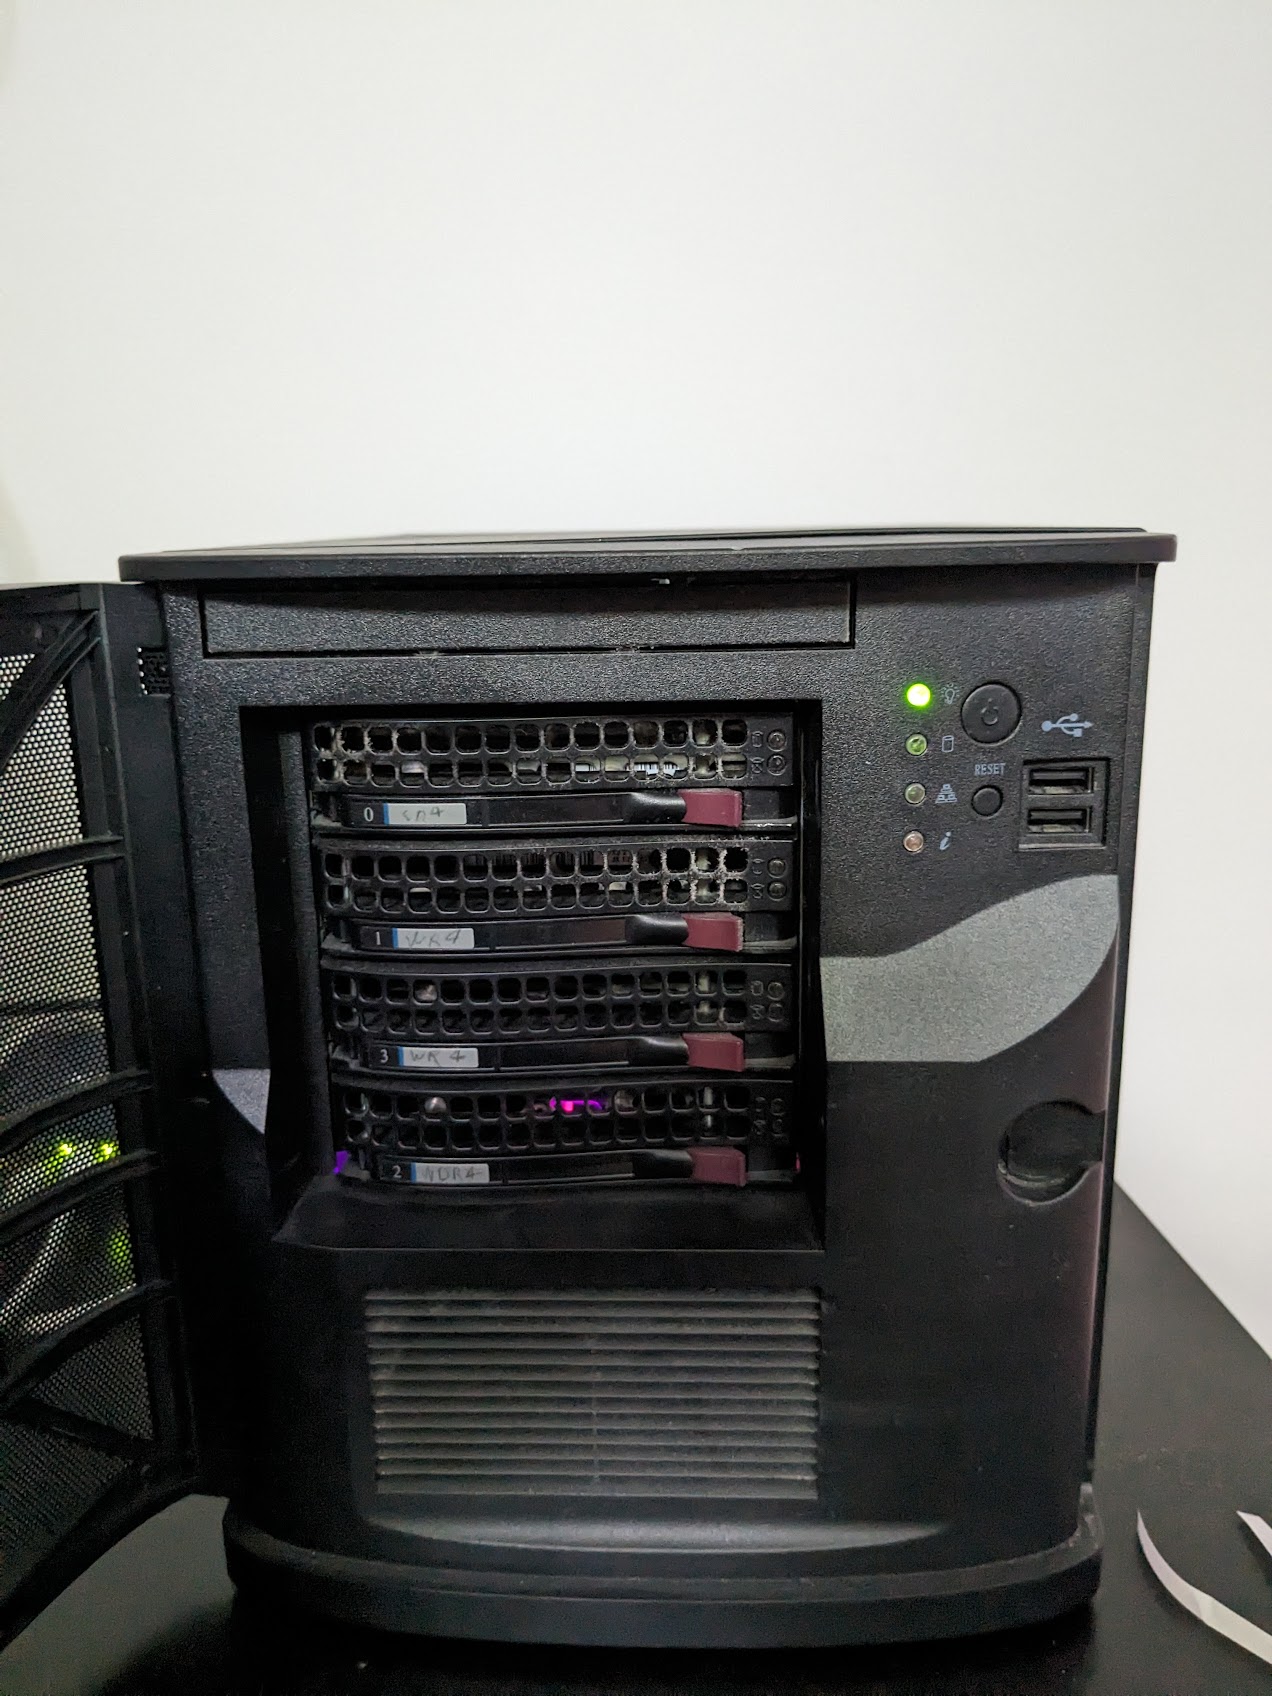
I run a small NAS for myself and my family. I hesitate to call it a "homelab" because it's really just the one box.

Four hard drive bays in a black chassis
Figure 1: This fancy case was US$120

Until recently this was running TrueNAS Core, which is based on FreeBSD. This was good for cred, but difficult for me to use in practice. I've spent two decades learning how to use Linux, and very little of that transferred. Maybe if I knew how to use a Mac it'd be easier.

TrueNAS has announced the apparent deprecation of the FreeBSD offering. That gave me the excuse I needed to finally to migrate to TrueNAS Scale, the "new" Debian-based version.

This past weekend I finally got around to doing that migration!

Reinstalling

My NAS normally runs headless, and my consumer motherboard definitely doesn't have IPMI. So after making sure it wasn't in use I unplugged it and dragged it over to my workbench. I plugged in a keyboard and monitor, inserted a flash drive I'd dd'd an image onto1, and walked through a very minimal installer.

When I'm setting up Linux I have all sorts of Opinions on dmcrypt and lvm. I had some grand designs on splitting the NAS's boot SSD into halves and installing the two OSes side by side, but I abandoned that. I just hit next-next-next-done, hit the "upgrade" option, and went to get a snack. When I came back the system had rebooted… back into TrueNAS Core.

It turns out I can't actually remember which is which2, and I'd written the BSD one onto the flash drive. Sigh. At least now I knew the key that dumped the motherboard into boot media selection.

A Clean Break

In theory there's supposed to be a way to migrate configuration from Core to Scale, but I didn't bother. I'd bodged together a lot of stuff outside the guard rails. Jail shells are similar to Linux containers but BSD and Linux are not.

So after rebooting, importing my ZFS pool, and setting the hostname, I clicked the "App" tab and installed the most important application, Plex I saw something in the corner about installing a "chart…"

oh no.

Oh Yes

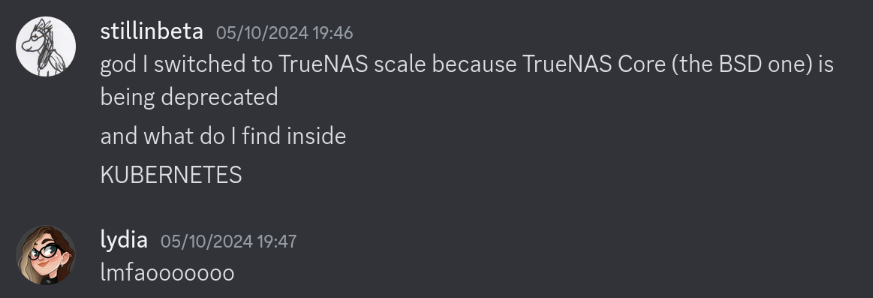
me: "god I switched to TrueNAS scale because TrueNAS Core (the BSD one) is being deprecated, and what do I find inside? KUBERNETES" lydia: "lmfaooooooo"
Figure 2: jumpscare

Yeah, it's k8s. And helm. It's using k3s, so it's not completely ridiculous, but still. What. Apparently I'm not the only person who was exasperated, since the next version will switch to docker, but that doesn't help me now.

I almost avoided writing anything, too. My first stop was setting up my household dashboard3, and that was just one container. After some editing to remove the secrets from the executable and into environment variables, I just needed to fill out a few fields in the GUI.

But of course I inevitably ran up against a limitation. Despite being k8s under the hood, which loves nothing more than a sidecar4, there was no way to add a pod with multiple containers. So of course I had to dive off the deep end myself.

First off: is there some official way to modify the YAML? No, of course not. Is there a way to add my own helm chart? Not easily. Can I just get access to kubectl? Unfortunately, yes.

The Paradox of Expertise

I often run into a situation when venturing outside my normal tech bubbles where I know both too much and too little. When deploying a "Custom App" on TrueNAS, there's a port forwarding setting, which obviously I don't have access to for my own Deployment.

Now how does that work? All the forum posts are unhelpful or condescending (the TrueNAS forums are MEAN!). So it's up to me and my Linux Skills.

I've got a working app running on port 9045, so let's figure this out. There's nothing in netstat:

root@montero[~]# netstat -lpnt | grep 9045
root@montero[~]#

Nor iptables:

root@montero[~]# iptables -L | grep 9045
root@montero[~]# iptables -L -t nat | grep 9045
root@montero[~]#

On the k8s side, there's no ingress controller:

root@montero[~]# k3s kubectl get ingress --all-namespaces
No resources found

And no stand-out annotations in the service:

root@montero[~]# k3s kubectl get svc -n ix-den-tv den-tv-ix-chart -o jsonpath={.metadata.annotations}
{"meta.helm.sh/release-name":"den-tv","meta.helm.sh/release-namespace":"ix-den-tv"}
root@montero[~]# k3s kubectl get svc -n ix-den-tv den-tv-ix-chart -o jsonpath={.metadata.labels}
{"app.kubernetes.io/instance":"den-tv","app.kubernetes.io/managed-by":"Helm","app.kubernetes.io/name":"ix-chart","app.kubernetes.io/version":"v1","helm.sh/chart":"ix-chart-2403.0.0"}

Eventually I figured out that I just needed to set a NodePort on the service and it would work. How? No idea! Some magic with kube-router5, probably. Either way, I eventually got my Deployment going, copied here for posterity:

---
apiVersion: v1
kind: Namespace
metadata:
  name: transmission
---
apiVersion: v1
kind: Secret
metadata:
  namespace: transmission
  name: wireguard-private
stringData:
  WIREGUARD_PRIVATE_KEY: <nice try bucko>
---
apiVersion: v1
kind: Service
metadata:
  name: transmission
  namespace: transmission
spec:
  selector:
    app.kubernetes.io/name: ellie-transmission
  type: NodePort
  ports:
  - protocol: TCP
    port: 9091
    nodePort: 9091
    targetPort: web
    name: web
---
apiVersion: apps/v1
kind: Deployment
metadata:
  namespace: transmission
  name: transmission
  labels:
    app.kubernetes.io/name: ellie-transmission
spec:
  selector:
    matchLabels:
      app.kubernetes.io/name: ellie-transmission
  template:
    metadata:
      labels:
        app.kubernetes.io/name: ellie-transmission
    spec:
      containers:
      - name: transmission
        image: linuxserver/transmission:4.0.5
        ports:
        - containerPort: 9001
          name: web
        - containerPort: 51413
          name: torrent-tcp
        - containerPort: 51413
          name: torrent-udp
          protocol: UDP
        volumeMounts:
        - mountPath: /config
          name: config
        - mountPath: /downloads
          name: download-complete
      - name: vpn
        image: qmcgaw/gluetun
        env:
        - name: VPN_SERVICE_PROVIDER
          value: nordvpn
        - name: SERVER_COUNTRIES
          value: Canada
        - name: SERVER_CITIES
          value: Vancouver
        - name: VPN_TYPE
          value: wireguard
        - name: DNS_KEEP_NAMESERVER
          value: "on"
        envFrom:
        - secretRef:
            name: wireguard-private
        securityContext:
          capabilities:
            add:
            - NET_ADMIN
      volumes:
        - name: config
          hostPath:
            path: /mnt/panini/ix-applications/releases/transmission/volumes/ix_volumes/config
            type: ""
          # emptyDir:
          #   sizeLimit: 500Mi
        - name: download-complete
          # emptyDir:
          #   sizeLimit: 1Gi
          hostPath:
            path: /mnt/panini/media/media
            type: ""

And after spending most of a day chasing down a typo in a port, I had my workload running smoothly. Of course, it still doesn't show up in TrueNAS. No idea how that will work (maybe the websocket?) I don't even know if it'll survive a version bump! But it's there for now.

Conclusion

Now, Kubernetes isn't a horrible choice for this kind of work. Helm is a good templating system, even if I have tiller flashbacks. Using k3s makes… not no sense.

The thing is… I go out of my way to make sure my hobbies are as far from my work as possible. I write in Rust or Haskell, I use Nix, I do web "design." Weekends are not for work! Weekends are for silly projects and and reading yuri. Instead I learned things I can use at my job. And for that, TrueNAS will never be forgiven.

At least now I don't need to remember the arguments to BSD sed.

Footnotes:

1

The way that works is fascinating, btw

2

I repeatedly screwed it up while writing this post

3

Under FreeBSD this was running on a Linux VM. I haven't figured out how set up VMs yet on Scale, the bridging configuration is very "BYO."

4

WHY YOU WANT SIDECAR FOR KUBERNETES? IS NOT GOOD ENOUGH AS PROCURED FROM CORE INFRASTRUCTURE TEAM? YOU THINK NEEDS IMPROVEMENT?

5

Turns out it's IPVS. Today I learned!

Let's make an information Display Part 3: Deploying

[Part 1] [Previous]

The Development Environment

Fake API

Several of our gauges involve making real requests to APIs. Ordinarily that's not a problem, but when debugging or iterating you can run up your usage very quickly.

The solution? Fake data!

We could just use static data, but what's the fun in that? This way we can tell when the backend gets updated.

pub trait Mock
where
    Self: Sized,
{
    fn get_one(rng: &mut ThreadRng) -> Self;

    fn get() -> Self {
        Self::get_one(&mut rand::thread_rng())
    }

    fn get_several(rng: &mut ThreadRng) -> Vec<Self> {
        get_several(rng)
    }
}

Here's the example for BusArrival:

fn get_one(rng: &mut ThreadRng) -> Self {
    let arrival = Local::now() + Duration::minutes(rng.gen_range(0..60));

    BusArrival {
        arrival,
        live: rng.gen(),
    }
}

You might notice Mock::get_several calls a function also named get_several.

This is for types like BusArrival that need preprocessing:

  fn get_several(rng: &mut ThreadRng) -> Vec<Self> {
    let mut arrivals = get_several(rng);
    arrivals.sort_by_key(|v: &BusArrival| v.arrival);
    arrivals
}

Traits in rust often behave a lot like Objects, but here's one way they're very different: If my implementation defines get_several, there's no way to use the Mock implementation. By breaking it out, we can call this default and then add our additional logic.

Serving the Mocks

We use a feature to enable these fakes:

[features]
fake = ["den-message/mock", "dep:rand"]

Then when we start up, we just generate our values and seed our cache:

#[cfg(feature = "fake")]
async fn init() {
    use den_message::*;
    use den_tail::cache::GaugeCache;

    let mut rng = rand::thread_rng();

    let vars = vec![
        GaugeUpdate::BusArrival(BusLine::get_several(&mut rng)),
        // etc
    ];

    for var in vars {
        GaugeCache::update_cache(var).await.unwrap();
    }
}

If we wanted, we could schedule updates to be randomly generated later, too, just by calling init in a loop with interval.

actix::spawn(async {
    let mut interval = actix::clock::interval(Duration::from_secs(1));
    loop {
        interval.tick().await;
        init().await;
    }
});

Trunk

Yew recommends trunk as a tool for development. It handles compiling, bundling assets, and serving webassembl applications. It even does automatic reloads when code changes.

Configurations, interestingly, come in the form of html files. Here's mine:

<!DOCTYPE html>
<html lang="en">
    <head>
        <link rel="stylesheet"
              href="https://fonts.googleapis.com/css?family=Overpass">
        <link data-trunk rel="css" href="static/den-head.css">
        <link data-trunk rel="copy-file" href="static/wifi_qr.png"
    </head>
    <body>
    </body>
</html>

I make use of cargo-make to run the application more easily.

Here I run the frontend:

[tasks.serve_he ad]
workspace = false
command = "trunk"
args = ["serve",  "den-head/index.html", "--port", "8090", "--public-url=/static"]

The workspace = false is because, by default, cargo-make will try to run serve_tail in every component directory. Not what we want in this case.

And the backend:

[tasks.serve_tail]
workspace = false
env = {"RUST_LOG" = "den_tail=debug"}
command = "cargo"
args = ["run", "--features", "trunk-proxy,fake", "--bin", "den-tail"]

There's fake from before. trunk-proxy does what it sounds like: it passes through requests to / on the backend to Trunk.

here's what the index function looks like:

#[get("/")]
async fn index(req: HttpRequest) -> Result<HttpResponse> {
    imp::static_("index.html", req).await
}

Where imp is one of two backends. When trunk-proxy is enabled, it uses actixproxy and actix-ws-proxy1

#[cfg(feature = "trunk-proxy")]
mod imp {
    pub(crate) async fn static_(path: &str, _req: HttpRequest) -> Result<HttpResponse> {
        use actix_proxy::IntoHttpResponse;

        let client = awc::Client::new();

        let url = format!("http://{}/static/{}", PROXY_HOST, path);
        log::warn!("proxying {}", url);
        Ok(client.get(url).send().await?.into_http_response())
    }
}

When it's not enabled, i.e. in production, it uses actixfiles instead:

pub(crate) async fn static_(path: &str, req: HttpRequest) -> Result<HttpResponse> {
    Ok(NamedFile::open_async(format!("static/{}", path))
       .await?
       .into_response(&req))
}

The Backend Deploy

Let's talk about production.

When I first built this application, I deployed in a Modern Way. I had a Dockerfile, I pushed it to my Dockerhub account, and pulled it down to run it. But this had some annoying properties. For one, because it was public, I couldn't add any secrets to the file. And since the QR code for the wifi is secret I would've needed to generate the image at runtime instead of compile time.

Plus, it was just overkill. Instead, now I just build a tarball.

This uses the Cargo-make rust-script backend to create an archive, grab the files, and write them all out.

[tasks.tar]
dependencies =  ["build-all"]
workspace = false
script_runner = "@rust"
script = '''
//! ```cargo
//! [dependencies]
//! tar = "*"
//! flate2 = "1.0"
//! ```
fn main() -> std::io::Result<()> {
    use std::fs::File;
    use tar::Builder;
    use flate2::Compression;
    use flate2::write::GzEncoder;

    let file = File::create("den-tv.tar.gz")?;
    let gz = GzEncoder::new(file, Compression::best());
    let mut ar = Builder::new(gz);

    // Use the directory at one location, but insert it into the archive
    // with a different name.
    ar.append_dir_all("static", "den-head/dist")?;
    ar.append_path_with_name("target/release/den-tail", "den-tail")?;
    ar.into_inner()?.finish()?.sync_all()?;

    Ok(())
}
'''

Then to deploy it, I just use ansible.

I copy the file over and extract it with unarchive:

- ansible.builtin.unarchive:
    copy: true
    src: '../den-tv/den-tv.tar.gz'
    owner: '{{ user.name }}'
    dest: '{{ dir.path }}'
  become: true
  register: archive

Set up a systemd service: #+

[Unit]
Description="den TV service"

[Service]
WorkingDirectory={{ dir.path }}
ExecStart={{ dir.path }}/den-tail
User={{ user.name }}
Environment=RUST_LOG=den_tail=debug

[Install]
WantedBy=multi-user.target

Then restart it:

- name: start service
  ansible.builtin.systemd_service:
    name: den-tv
    daemon-reload: "{{ unit.changed }}"
    enabled: true
    state: restarted
  become: true

It runs on a virtual machine on my NAS, so it's easily accessible over the network.

The Frontend Deploy

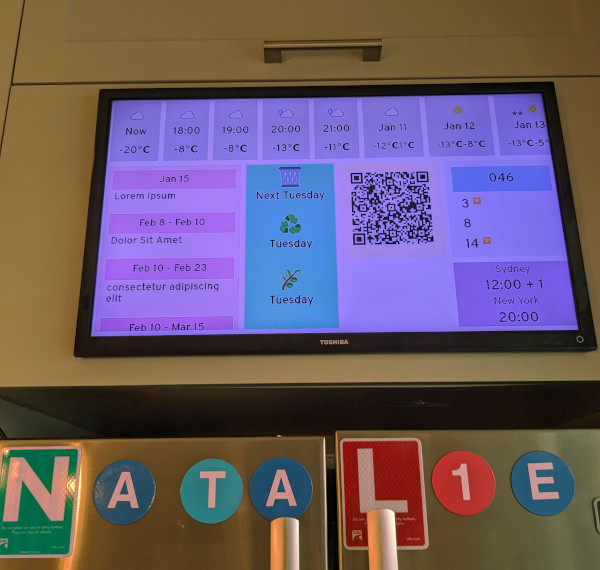
The frontend is served by, what else, a Raspberry Pi.

den-tv-photo-in-situ.jpg
Figure 1: My phone really did not like taking this picture

I planned to use cage to automatically start a full-screened browser. But for whatever reason, on the version of Raspbian I'm running cage hard-crashes after a minute or two. Instead, I'm just using the default window manager and a full-screened Chrome2. I've got a wireless keyboard I can grab to make changes if need be, but it's been rock solid.

Automatic Reloads

There's one last trick: We know how to restart the backend when the code changes, but what about the frontend?

Take a look at build.rs from den-message:

const ENV_NAME: &str = "CARGO_MAKE_GIT_HEAD_LAST_COMMIT_HASH";

fn main() {
    println!("cargo:rerun-if-env-changed={}", ENV_NAME);
    let git_hash = std::env::var(ENV_NAME).unwrap_or_else(|_| "devel".to_string());
    println!("cargo:rustc-env=GIT_HASH={}", git_hash);
}

We use an environment variable exposed by cargo-make to capture the git hash. It's stored in den-message:

pub const VERSION: &str = env!("GIT_HASH");

When the backend server receives a new connection, it sends a hello message:

fn send_hello(ctx: &mut WebsocketContext<Self>) {
    let hello = &DenMessage::Hello {
        version: den_message::VERSION.to_string(),
    };

    match serde_json::to_string(hello) {
        Err(e) => error!("Failed to encode Hello: {:?}", e),
        Ok(msg) => ctx.text(msg),
    }
}

Because den-message is shared between the backend and frontend, it's also available on the websocket side. When we receive the Hello message, we check to see if it matches the version the webassembly was compiled with:

fn update(&mut self, ctx: &yew::Context<Self>, msg: Self::Message) -> bool {
        match msg {
            // snip
            Ok(DenMessage::Hello { version }) => {
                if version != den_message::VERSION {
                    gloo_console::log!("reloading for version mismatch");
                    let _ = window().location().reload();
                }
            }
        }
        true
    }

If the backend sends a different version, the page knows to reload. Since the backend serves the frontend, the next reload will always have the newest version.

The coolest effect of this is that I can sit at the kitchen table and run ansible-playbook to ship a new version. Then a few seconds later, the screen on the other side of the table automagically refreshes and shows me my changes.

Pretty snazzy!

Conclusion

I hope you've enjoyed this series, or at least found it informative. This project is absolutely over-engineered, and over-complicated. It took me multiple weeks to build, but I learned a ton. Along the way my searches led me to a lot of random folks' blog posts about things they've done. I hope if nothing else, these posts show up in someone's search results and help them solve a problem.

Thanks for reading, and feel free to get in touch!

Footnotes:

1

i wrote this! I learned a lot about actix internals in the process. I'm still slightly annoyed how short the solution was.

2

For whatever reason, the version of Firefox from Raspbian refuses to run webassembly.

Let's Make an Information Display Part 2: Frontend

Previous: Part One

So we have our data. We need some way to display it in a human-friendly format. Obviously I don't have anything against pure json, but it does not make for good information density.

If we're building a frontend application, the most obvious answer is Javascript. But I'm not going to be writing Javascript in my free time. That'd be like writing a Go backend: completely unbecoming.

What do we use instead? That was rhetorical, we're obviously using rust.

There's a number of front-end Rust libraries, but the three I considered were dioxus, percy, and yew. I'd previously used Yew for ezeerust, a web frontend for a z80 emulator I wrote. The others I just got from various blog posts other people have written. Since this is a purely personal project I engaged in some vibes-based-engineering.

And by that I mean I started writing this thing in September and have no idea why I picked what I did. Yew it is!

Connect for

Our data is waiting for us on the other end of the websocket, so the first thing to do is connect.

fn connect(&self, ctx: &yew::Context<Self>) -> Result<(), JsError> {
      let ws = WebSocket::open(format!("ws://{}/ws", get_host()).as_str())?;
      ctx.link()
          .send_stream(ws.err_into().and_then(parse_ws));
      Ok(())
  }

Since this is a wasm app intended to run in a browser, we're using gloo_net for websockets.

But already this looks pretty familiar!

Yew and Me

Yew is similar to React.js, which means it's declarative. Where a vanilla Javascript app might say "change #busupdate .route26 to this text," you instead say "The bus route should look like this" and the system figures out how to efficiently make changes.

This looks remarkably similar to actix! We've got a Context and we're going to send a stream somewhere.

Here's the signature for send_stream we're calling here:

pub fn send_stream<S, M>(&self, stream: S)
where
    M: Into<COMP::Message>,
    S: Stream<Item = M> + 'static,

and here's add_stream from actix:

fn add_stream<S>(&mut self, fut: S) -> SpawnHandlewhere
where
    S: Stream + 'static,
    A: StreamHandler<S::Item>,

But while an Actix application features a collection of quasi-autonomous Actors sending each other async messages, Yew applications are built out of a tree of Component objects.

We'll have one Application component that creates lots of little Gauge components, and they'll all create smaller components still. Also an Actor, a Component only handles one kind of message. Let's look at the trait:

pub trait Component: Sized + 'static {
  type Message: 'static;
  type Properties: Properties;

  // Required methods
  fn create(ctx: &Context<Self>) -> Self;
  fn view(&self, ctx: &Context<Self>) -> Html;
}

Usually Component::Message would be an Enum type, but in our case we only care about the results of parsing websocket inputs we called with add_stream:

type Message = Result<DenMessage, DecodeError>;

Then we just need an update handler:

fn update(&mut self, ctx: &yew::Context<Self>, msg: Self::Message) -> bool {
    match msg {
        Ok(DenMessage::Update(update)) => self.handle_gauge(update),
        // stay tuned for part 3!
    }
}

All handle_gauge will do is update the fields of the application which look like this.

pub struct App {
    bus_arrivals: LastUpdate<Vec<BusLine>>,
    //snip
}
impl App {
    fn handle_gauge(&mut self, msg: GaugeUpdate) {
        match msg {
            GaugeUpdate::BusArrival(bus) => self.bus_arrivals.set(bus),
            // snip
        }
    }
}

LastUpdate is a wrapper that provides a little housekeeping, specifically tracking when last a field was updated.

This information is used to detect stale data. If a gauge hasn't been updated in a while, it'll visually dim itself so we know not to trust it.

Render Unto Caesar

Now that we have our data secured, we need to display it! Somehow this internal state needs to become HTML. And Yew has a very nifty mechanism for doing this: the html!() macro.

Similar to React's JSX, this lets us write natural-ish HTML. Here's the snippet for the bus updates:

fn view(&self, _ctx: &yew::Context<Self>) -> yew::Html {
    html! {
        <main class={classes!("container")}>
            <Gauge slug={"bus"} stale={self.bus_arrivals.stale()}>
                <BusGauge routes={self.bus_arrivals.get()} />
            </Gauge>
            // snip
        </main>
      }
}

Like with JSX, lowercase tags are just plain HTML, in this case a semantic HTML tag. But Gauge and BusGauge represent capital-C Components.

Gauge is pretty simple, basically "Wrap in <article> with these classes, indicating if it's stale.

#[derive(Properties, PartialEq)]
pub struct GaugeProps {
    pub stale: bool,
    pub slug: &'static str,
    pub children: Children,
}

#[function_component(Gauge)]
pub fn gauge(props: &GaugeProps) -> Html {
    let cls = classes!("gauge", props.slug, props.stale.then_some(Some("stale")));
    html! {
        <div class={cls}>
            <h2>{props.slug}</h2>
            { props.children.clone() }
        </div>
    }
}

We can see the stale and slug arguments that correspond to attributes we passed in.

Children is a special value that allows us to wrap other tags in <Gauge></Gauge> tags. Otherwise, we'd have <Gauge /> and it wouldn't be nearly as expressive.

But this a a pretty simple component. BusGauge is where it gets interesting.

Gauge your Interest

#[derive(Debug, Clone, Properties, PartialEq)]
pub struct BusProps {
    pub routes: Rc<Vec<BusLine>>,
}

pub struct BusGauge;

Yew components are supposed to store most of their data in Properties. the component gets re-rendered.

This is good! That's how information trickles down the component graph from the root. The BusGauge struct will exist for the life of the application. If we stored information there at create time, It'd never be updated when App sent us new data.

The Rc there is because Properties are cloned very frequently, so it's a good idea to make those clones cheap.

Let's see what that this view method looks like.

fn view(&self, ctx: &yew::Context<Self>) -> Html {
    html! {
        <ul>
            {for ctx.props().routes.iter().map(bus_route)}
        </ul>
    }
}

Fair enough. bus_route similarly maps down to individual_arrival(), which handles the numbers. That's where the interesting stuff happens. Let's look back at BusArrival:

#[derive(Serialize, Deserialize, Debug, Clone, PartialEq)]
pub struct BusArrival {
    pub arrival: chrono::DateTime<Local>,
    pub live: bool,
}

arrival is an absolute Datetime, but we know our display is just minutes to arrival. So we calculate that.

let mins = (arrival.arrival - Local::now()).num_minutes();

What happens if mins is less than zero? We skip it, of course. individual_arrival returns Option<Html> instead of Html, because a departure time of -1 isn't too useful. But otherwise, we render it out.

(mins > 0).then(|| {
      html! {
              <li> { format!("{}", mins)}
              if arrival.live {
                  <sup class={classes!("arrival-live")}>{"🛜"}</sup>
              }
              </li>
      }
  })

bool::then is a handy method that returns Some if true, or None if false. Could this be an if? sure! But I really like chains like this. Debate me in the comments1. Then we just write out the minutes, with the little icon if it's live. It probably should be a fancy SVG icon, but I'm a backend person at heart, cut me some slack.

We're all done, though! We've rendered our gauge!

…once.

Nothing But Time

There's actually two kinds of Component you can write in Yew: function components (like the Gauge) and struct components (like BusRoute). The function components have a lot less boilerplate, but the struct components give you a lot more control over the lifecycle.

We're using that here. Here's BusGauge::create, called when our component is initialized:

fn create(ctx: &yew::Context<Self>) -> Self {
    let _ = {
        let link = ctx.link().clone();
        Interval::new(30_000, move || link.send_message(()))
    }
    .forget();

    Self
}

First, we get a reference to ourselves. Then, every 30 seconds, we send ourselves an empty message. Interval is from the gloo_timers package, and by calling forget we ensure it will run indefinitely.

The content doesn't matter: any message will call Component::update.

fn update(&mut self, _ctx: &yew::Context<Self>, _msg: Self::Message) -> bool {
    true
}

update returns a boolean, which represents whether we should re-render our element. By doing so unconditionally, we re-render our gauge every 30 seconds. And because the minute offset is calculated at render-time, not on the backend, it'll never be more than 30 seconds out of date.

I actually use this for a World Clock gauge too. By setting the update interval to every second and sticking a Local::now() in the render, you've got a nice little clock that never goes stale.

CSS

Here's the part of web development that feels the most black magic to me. I've got to turn this:

An unstyled bold header that says "bus", and then a bulleted list with arrival times
Figure 1: web 1.0-tastic

Into something that conveys information usefully.

Now, let's do some expectation setting. I picked colours mostly based on named HTML colours. This is not going to win any design awards. But it will, hopefully, be legible.

Let's get started!

Variable Speed

Did you know CSS has variables now?? Check this out:

.bus {
    --bg: aliceblue;
    --2nd: lightblue;
}

.gauge {
    background-color: var(--bg);
}

Did you think I was joking about named colours? I love named colours.

The same unstyled headers, but with pastel colours
Figure 2: who doesn't love pastels

The Grid… a digital frontier…

The biggest thing I learned how to use was the Grid layout

I've been doing web development since rounded corners required PNGs, so this feels like the deep magic.

Here's my template:

.container {
    display: grid;
    gap: .5em;

    grid-template-areas:
        "weather  weather weather weather"
        "calendar trash   wifi    bus"
        "calendar trash   .       clock";
}

And look what this makes:

A grid of coloured rectangles full of text
Figure 3: this already blew my mind

But that's not the layout we specified. So we give them names:

.bus {
    grid-area: bus;
    --bg: aliceblue;
    --2nd: lightblue;
}
The same grid but arranged with a grey box at the top
Figure 4: a shape emerges

This is starting to look right, but it's not really following our arrangement.

There's a bunch of new units we have access to. No mouse means no scroll bars, so we'll use vh and vw, viewport height and width.

width: 100vw; /* 100% viewport width */
height: 100vh; /* 100% viewport height */

And we can specify the sizes we want in terms of fr units.

grid-template-rows: .2fr 1fr .8fr;

This roughly means "10%, 50%, 40%." The fr values are a ratio, rather than absolute values.

The grid again, but with a grey box at the top, then a grid of eight boxes
Figure 5: now we're talking

And from there, it's just some basic styling:

/* reset the default padding and margins from ul */
ul {
  padding: 0;
  margin: 0;
}

/* we don't use the headings */
h2,
h3 {
    display: none;
}

/* make a little box with the route number */
bus .route-line {
    background-color: var(--2nd);
    padding: .5em;
    list-style: none;
    text-align: center;
}

/* get out of here bullets */
.bus li {
    list-style: none;
    margin: 0.5em;
}

/* I can deny it no longer! ...i am small */
.bus .arrival-live {
    font-size: var(--font-tiny);
}
The bus gauge with [26] in blue, and the background in lighter blue. several numbers are listed below.
Figure 6: Almost ready

One of the last changes I made was for legibility. The display we're using is only 720p, and I wanted to be able to see it from a distance. For the font, I went with Overpass, based on the venerable Highway Gothic used on American highway signs2.

The other thing was slightly bolding everything:

:root {
    font-weight: 600;
}

The End Result

A grid of several coloured boxes. Across the top is the weather, then across the bottom is a calendar, emoji representing trash, a QR code for our wifi network, bus arrival times, and a clock showing the time in Sydney and New York
Figure 7: Tada 🎉

Next Time

Deployment! I'll walk through how deployed the client, the server, and the development tooling I build along the way

Footnotes:

1

this blog does not have comments

2

this is a anti-Clearview house

Other posts